
 It’s not difficult to get a personal website up and running. But it can be a little daunting to put together a site that showcases you and your professional achievements. What your personal website says about you can make or break your chances of getting hired. No pressure, right?
While it might seem intimidating to put yourself out there online, don’t skip it! A personal website is an important piece of your professional puzzle. Not only is it a place to display your resume and contact info, your personal website gives you increased visibility online.
Considering more than 80% of recruiters google candidates before considering them for a job, you want to take control of your digital footprint. And since half the battle of getting an interview is showing up on a recruiter’s radar, your personal website makes it much easier to get found.
So, if you don’t have a personal website up and running, now is as good as time as any to get one online. It’s easy to DIY and affordable too. Plus, as a professional, your personal website offers additional benefits you may not have even considered:
Offers a Glimpse of Your Personality
Your resume does a great job of outlining your work history. It’s not so great at demonstrating your personality. A personal website punches up the personality factor while showcasing your professional prowess — win, win.
Shows You Take Your Career Seriously
A recent survey found recruiters were more wowed by a personal website than any other personal branding tool. It signals to others that you take your career seriously enough to invest time and money it in it. Clearly, this speaks volumes to recruiters who are constantly on the hunt for the best and brightest.
Gives You a Chance to Control Your Online Footprint
In today’s digital world it’s not a matter of if a recruiter will google you, but what they’ll find out about you. With your own personal website you get control over what comes up in google searches. Having a professional online footprint lets you stand out in the crowd (in the most positive way possible).
So, whether you want to establish yourself as an expert in your field, are contemplating a career change or actively seeking a new job, don’t underestimate the power of a personal website in helping you reach your professional goals. Ready to take charge of your own professional virtual presence? Let’s get started.
Hosting and Domain
Every website needs two basic things to get online: hosting and a domain name. Your domain name is the physical address where your website is found, i.e., www.yourpersonalbrandingsite.com.
Hosting is how your site ‘lives’ online. Think of your host as your site’s landlord. You’ll pay a small ‘rent’ each month to your hosting provider in order to keep your personal website online.
In a sea of hosting providers, which do you choose? For personal website hosting, I recommend BlueHost. The benefits of choosing BlueHost include:
- Free domain ($15 value)
- 24/7 support
- One-click WordPress installation
And because BlueHost knows you’ll be oh-so happy with their hosting, they offer a 30-day money back guarantee. If you’re not happy, they’ll make it right or refund you — no questions asked.
Selecting Your Personal Website Domain Name
Now it’s time to pick a domain name. Don’t overthink this. Your first choice should be your name: www.YourName.com. If you have a common name, like me, your name may already be taken. Go ahead and find out if your name is available. Simply type it in the domain name checker below:
Don’t panic if your name is taken. You can add your middle initial. You can also throw in a descriptive word relevant to what you do. For example, AshleeAndersonWrites.com or AshleeAndersonBlogs.com.
Just try to keep it as simple as possible. And make sure your professional name you use on your resume is in there! This is great for search engine optimization (SEO) and increases the chance of your personal website showing up in searches when a recruiter googles you.
Building Your Personal Website
When you’re ready to get started, head on over to BlueHost to purchase hosting and claim your free domain name. Remember, with BlueHost and WordPress, you can get a professional personal website up and running without touching a single line of code. This is the first page you’ll see:
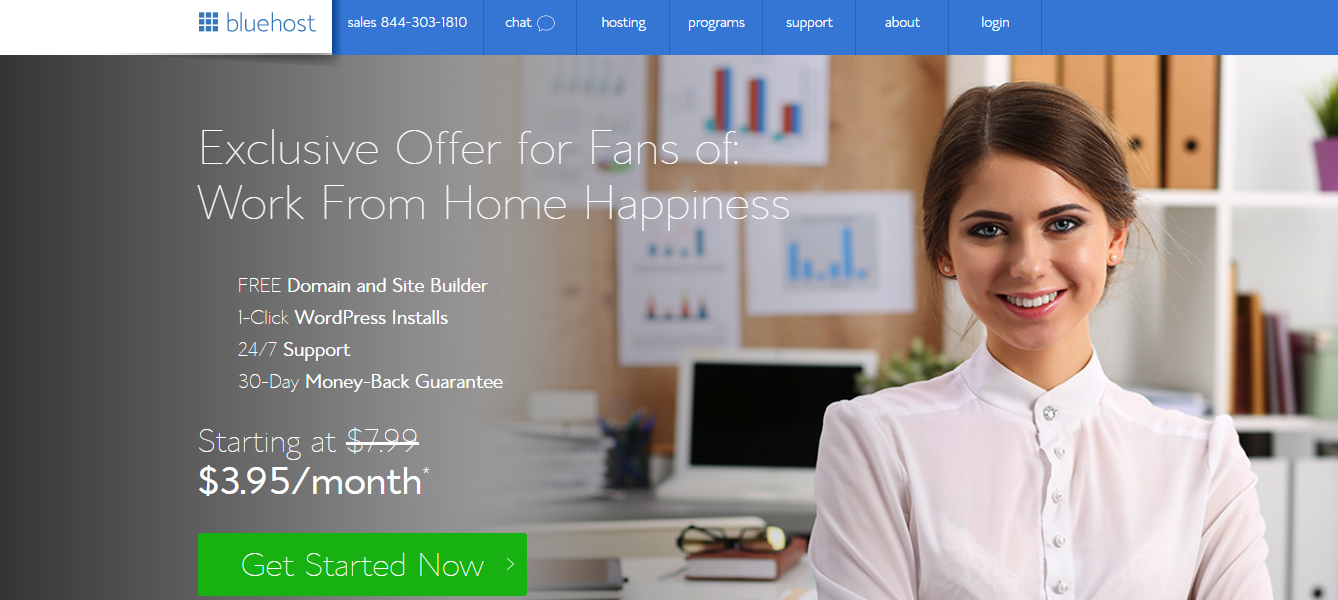
This welcome screen explains the benefits of BlueHost and offers you a discount for being a Work From Home Happiness reader — woot woot! Simply click the green “get started now” button to move on.
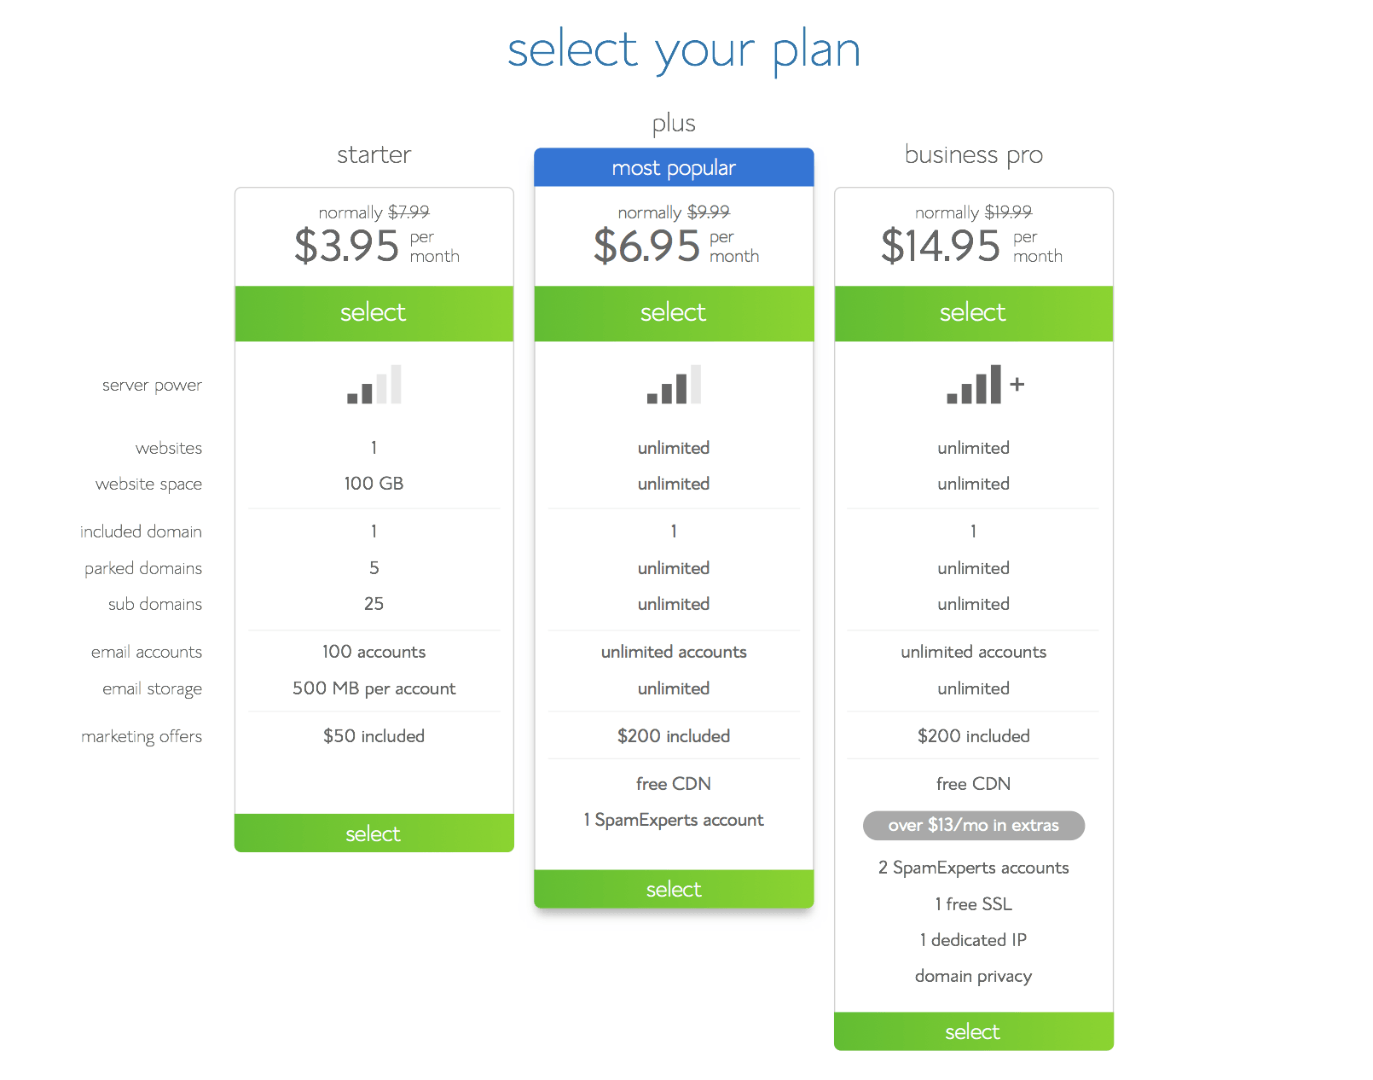
Select Your Personal Website Hosting Package
BlueHost offers different plans to meet a variety of hosting needs. Because you’re looking to set up a professional website, the “starter package” will meet all your needs (and then some). With this plan, you’ll receive your free domain name and monthly hosting for as little as $3.95 per month.
Once you select the starter plan, you’re automatically directed to the next page where you’ll claim your domain name.
Register Your Professional Website Domain
If you used the free domain name checker, you should already have the domain name you want to purchase in mind. During this step you’ll actually claim that name and make it your own.
Simply type your chosen domain name in the “new domain” box on the left (or the transfer domain box if you already have one).

Hit the blue “next” button to move forward. You now grabbed your professional website domain name (congrats, btw!). During the next step, you’ll provide your contact information to BlueHost.
Account Information
Simply fill in the form on this page with your current contact info. Double check everything for accuracy!
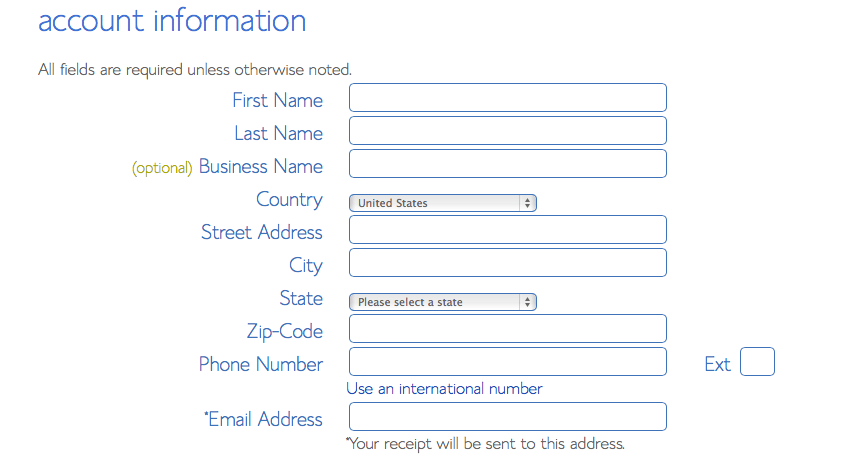
The provided email address will be the primary means of communication between you and BlueHost. It’s also where your receipt will be emailed!
Choose Your Professional Website Hosting
Now that you’ve selected your domain and provided your contact deets, it’s time to to officially choose your hosting package.
Remember, since you’re building a professional website, the starter package will meet all your hosting needs. And when you prepay 36 months in advance, you’ll receive hosting for just $3.95 a month — that’s less than the cost of a latte.
Plus, you’ll know that your professional website will be ready and raring to go for the next three years to meet all your career and personal branding goals!
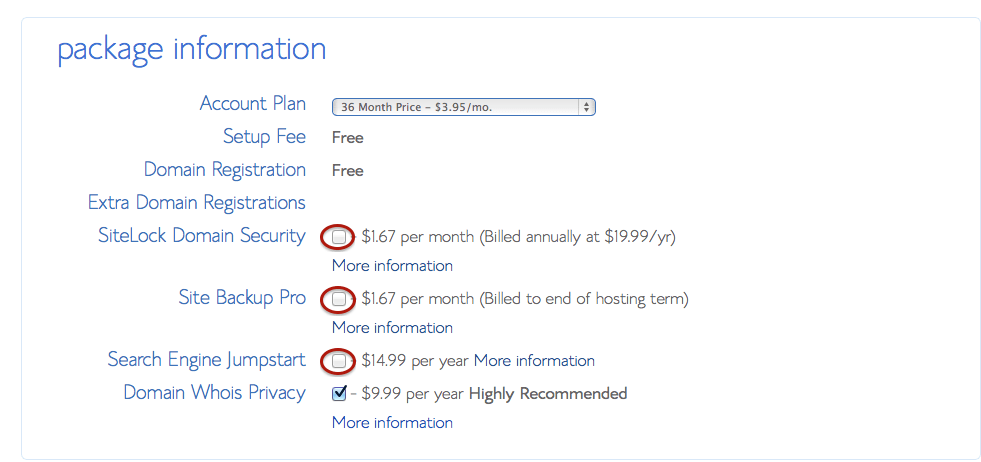
Do I Need Extras?
That’s up to you. I always swing for Domain Whois Privacy. Why? Whenever you purchase a domain, your contact information must go into a database. It’s the law. With Whois Privacy, a proxy name is used. This protects your privacy but still gives the required contact information the law requires. However, it’s completely optional. You do not need any extras to get your personal website up and running.
Complete Your Purchase
You’ve got your domain and hosting package picked out. All that’s left to do is make it official! On the next page, provide your billing information, confirm you’ve read the terms and conditions, and hit the blue “next” button:
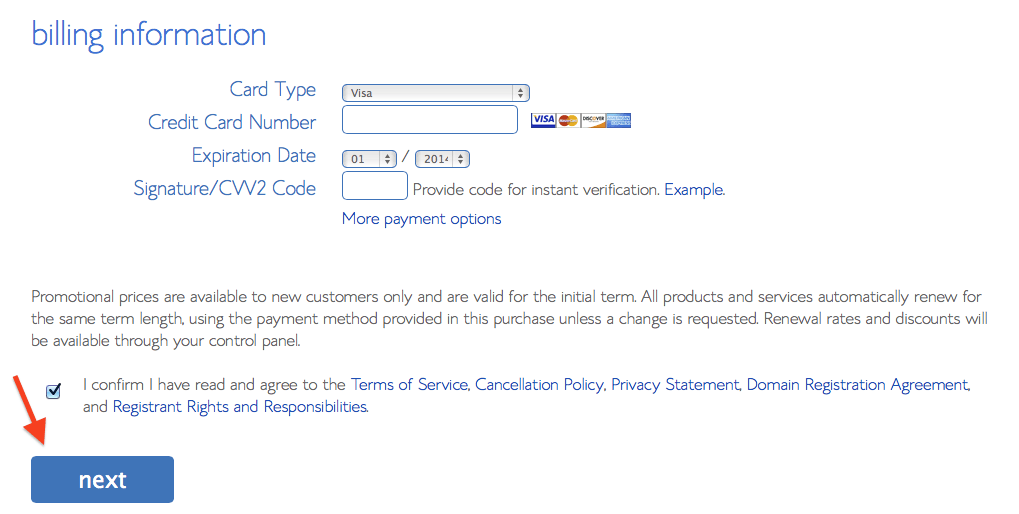
Congratulations! You’ve officially purchased your personal piece of the Internet and are one step closer to personal branding perfection.
Install WordPress
Now that you’ve purchased hosting and received your free domain name via BlueHost, it’s time to install WordPress. WordPress is a content management system (CMS). It’s used by big businesses to small bloggers and everyone in between.
It’s a popular platform for website creation because it’s so easy to use. Even if you’ve never built a website before, you can use WordPress to create a polished site quickly.
And because you chose BlueHost, you can install WordPress for free in just a few clicks.
Navigate to Your cPanel
To get started you’ll need to login to your new BlueHost account and navigate to cPanel.
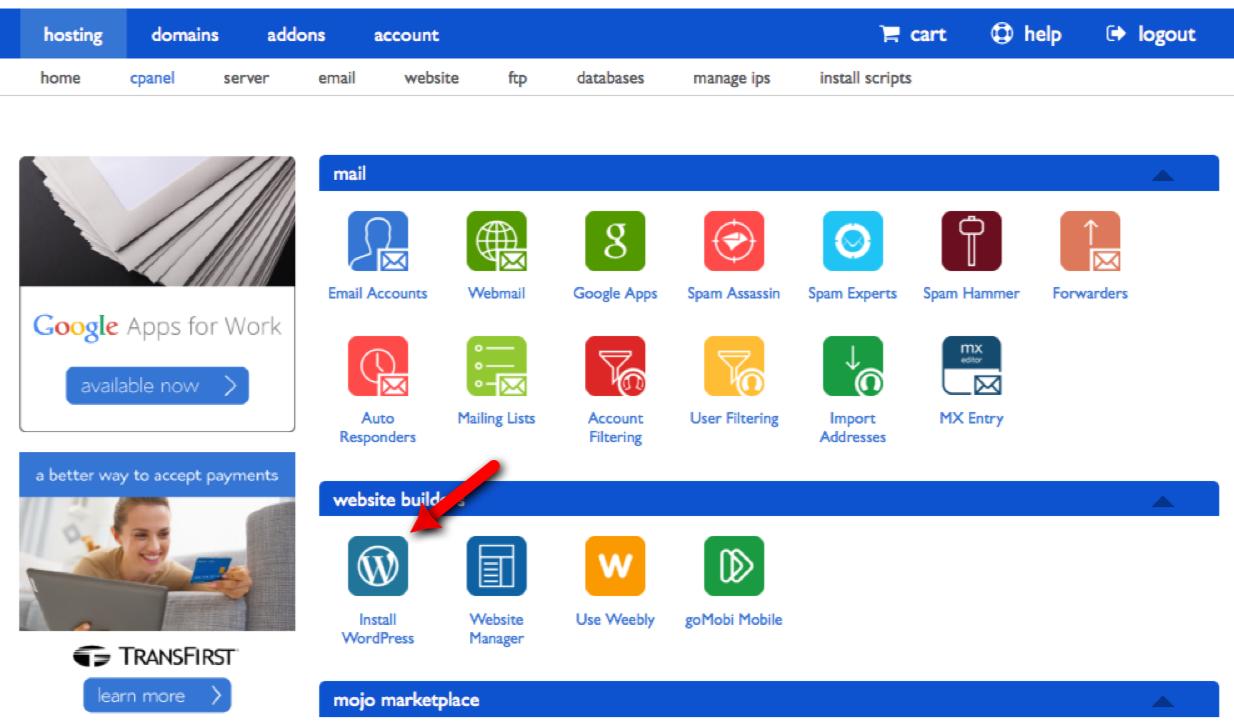
Your cPanel is like a command center. This is where you can access different apps and software to build your website. It’s also where you can install WordPress. To do that, simply click the “install WordPress” button.
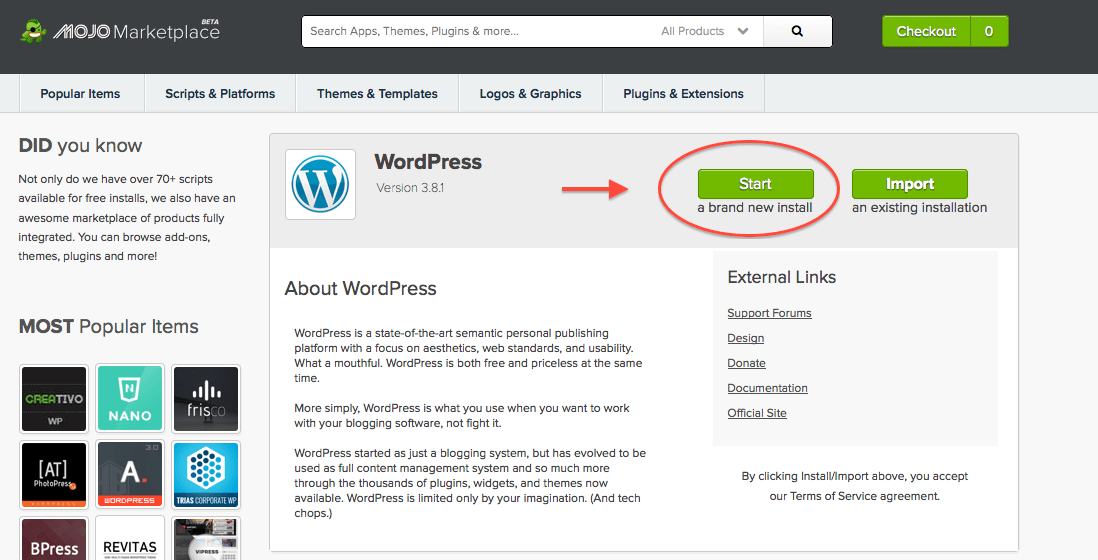
Brand New Installation
From there, select the start a brand new install option by clicking the green button as pictured below:
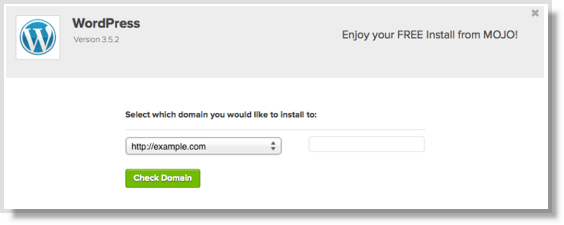
Select Your Personal Website Domain Name
Now you need to select the domain name you want to install WordPress on. In the case, it’s your professional website domain.
Start The Installation Process
Once the correct domain is selected, you can begin the installation process. BlueHost automatically does this for you once you hit the “install now” button. But before you hit the “install now” button, make sure you change your Site Name, Admin Username, Admin Password, and Admin Email Address.
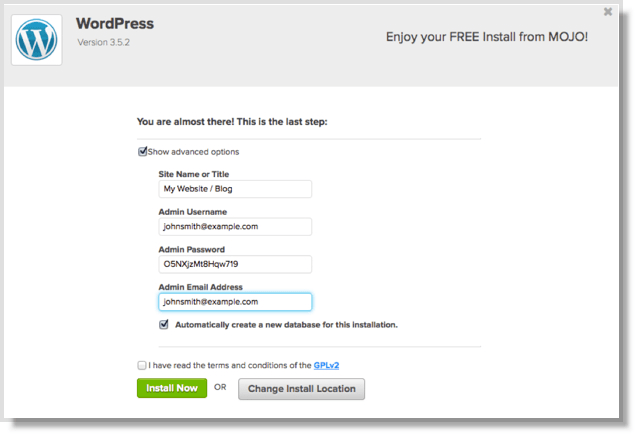
Save this information! These are the login details you’ll to access your WordPress site. Once you’ve put in all the information, hit the green “install now” button.
Finish Installing WordPress
During the installation process, you’ll see the following screen:
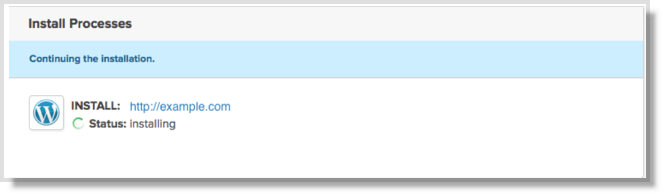
It may take a minute to finish installation, so just sit tight. But that’s it! You officially installed WordPress to your personal website! Now it’s time to make it your own.
Upload a Resume Theme
Your WordPress personal website is now ready to be customized. To do that, you’ll need to login by heading to your site’s address followed by /wp-admin
Example: www.yoursitename.com/wp-admin
You’ll land on a page that looks like this:
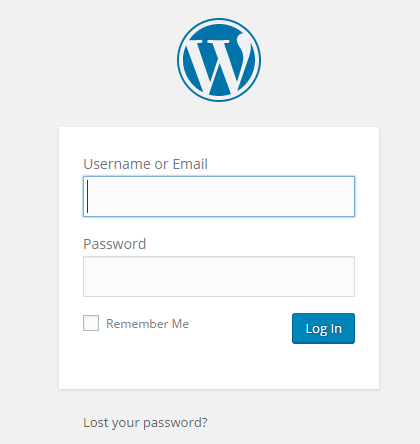
This is where you’ll type in the username and password you selected during the WordPress installation process. From there, hit the blue “login” button.
Navigating Your WordPress Dashboard
Once you login, you’ll land on your WordPress Dashboard. At first glance, it’s overwhelming. But don’t be intimidated. You’ll use your dashboard to navigate the back end of your site. It’s where you’ll create content and customize your personal website to make it your own!
WordPress Professional Website Theme
What makes WordPress easy to customize without coding are the many themes available to use. With the right WordPress theme installed, half the work is done for you. I promise.
Think of it in terms of a house. WordPress are the walls to your website and your theme is the decor. The theme you use can make all the difference in how professional your site looks.
For a modern, professional personal website I recommend the Hired theme by Modern Themes.
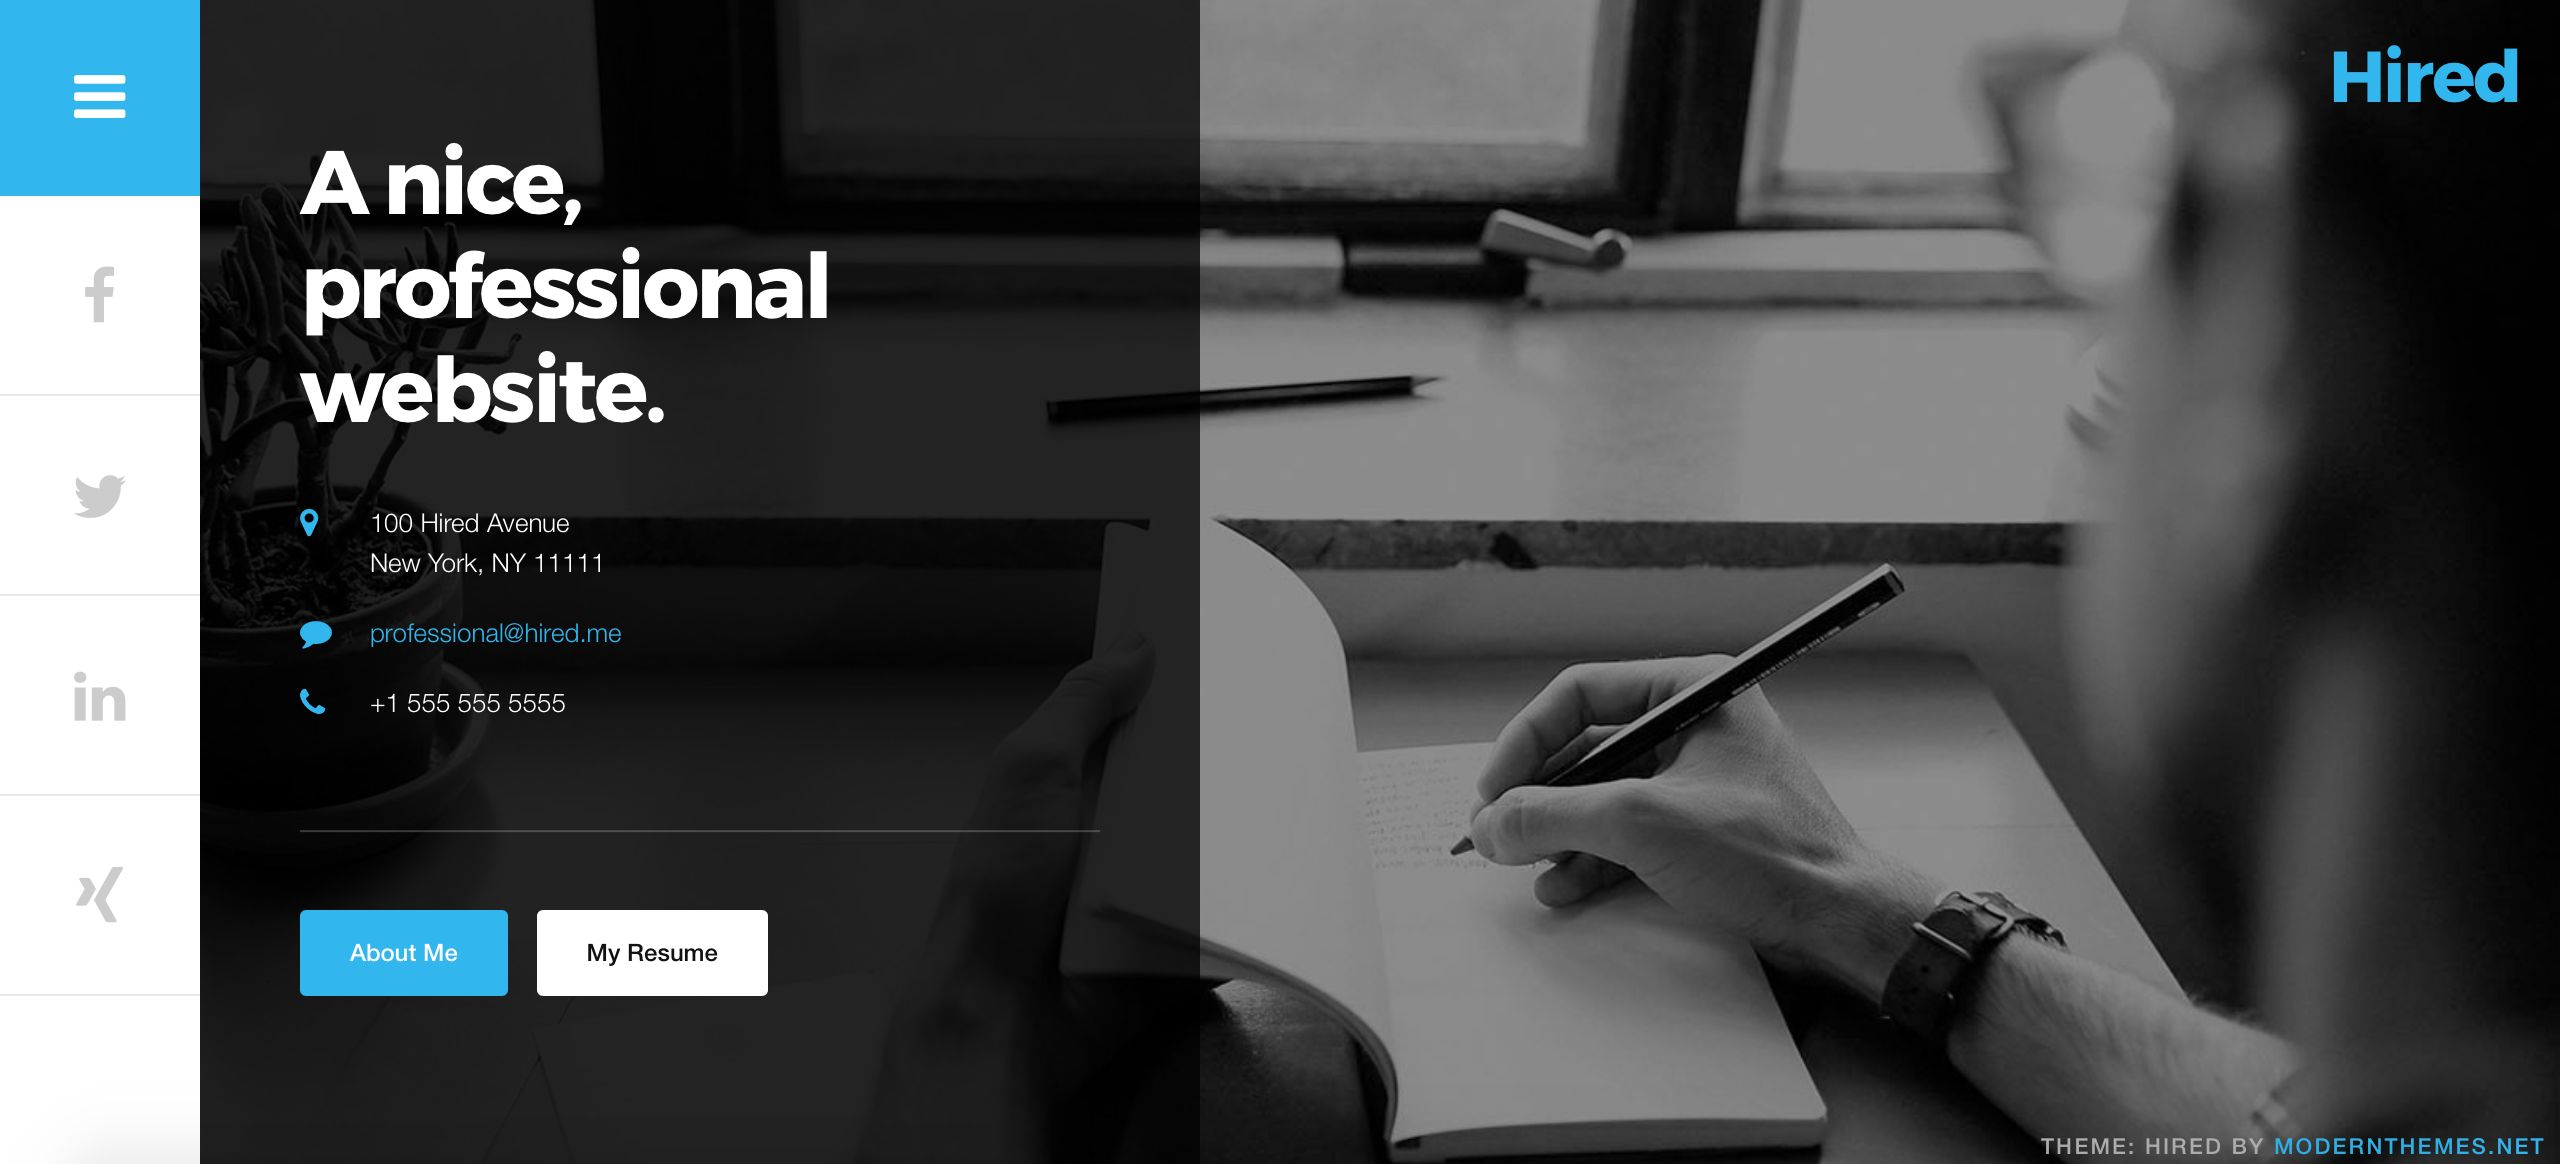
It’s a minimalistic theme that showcases all the important information about Y-O-U: social profiles, resume, and about me page. The best part? There’s a free version you can download without spending a single penny,
You can also grab a premium copy of the theme for just $25. The premium version comes loaded with even more options that’ll help make your personal website as unique as you.
Uploading a Personal Website Theme to WordPress
Whether you choose Hired or another resume theme, the steps to get it onto your WordPress site are the same. First things first, download the theme. The theme will download as a .zip file. Leave it zipped!
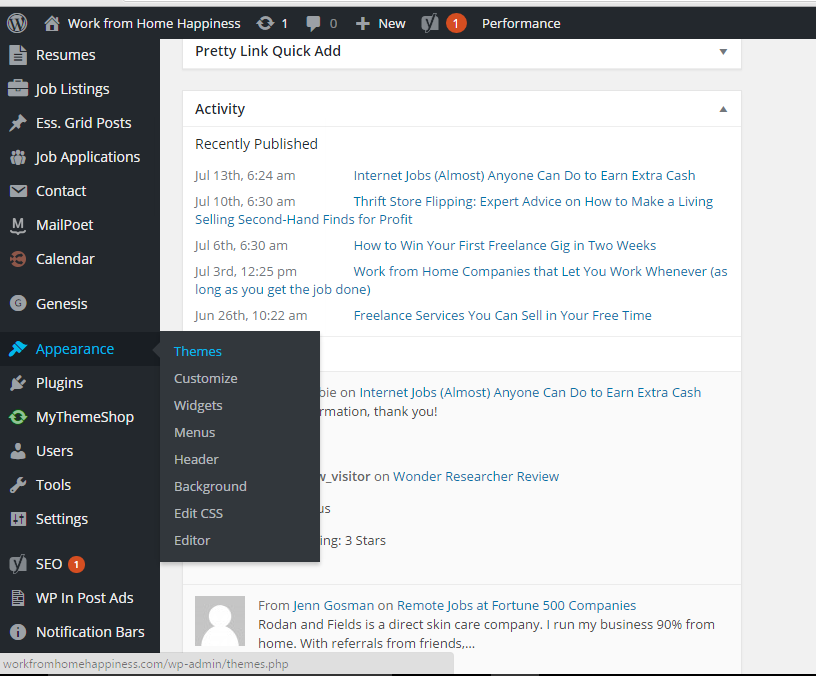
Once it’s downloaded, navigate to Appearance > Themes from your WordPress Dashboard to upload it:
This takes you to the themes page. Here you’ll see the current themes available to you. By default, WordPress comes with three themes: Twenty Fifteen, Twenty Fourteen, and Twenty Thirteen. You’ll see these themes here.
To upload the Hired theme you just downloaded, click on the “add new” button at the top of the page: 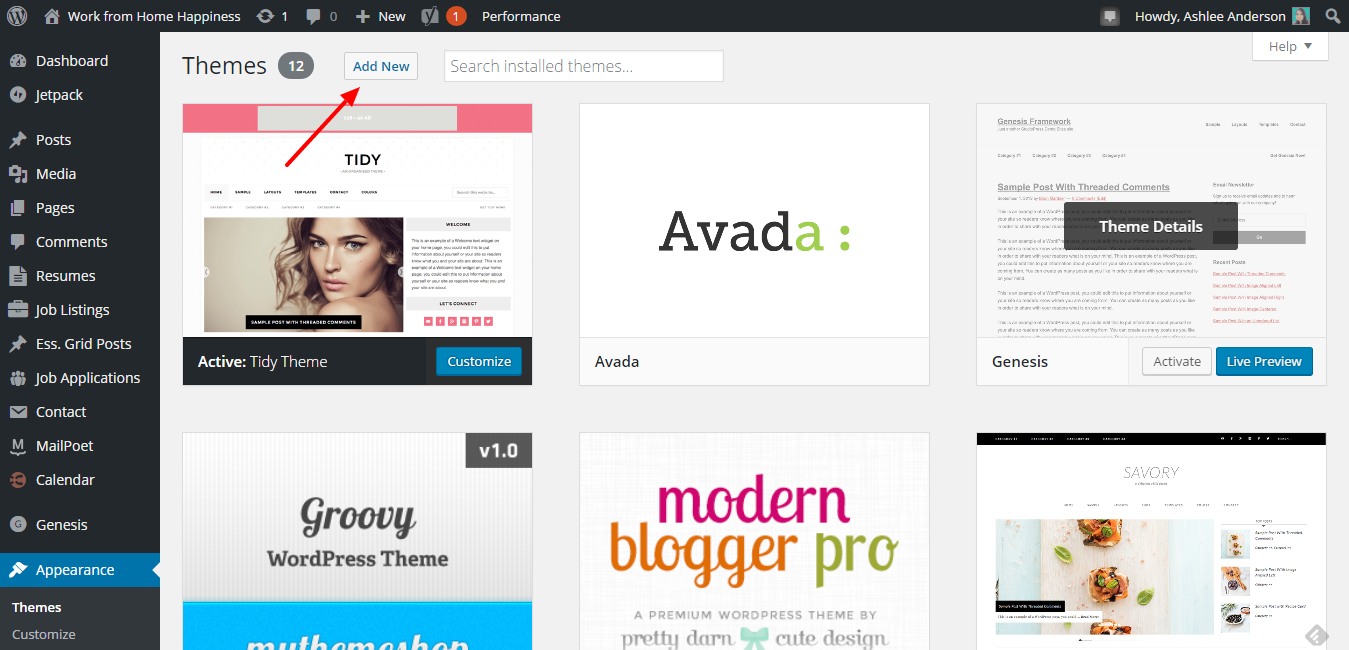
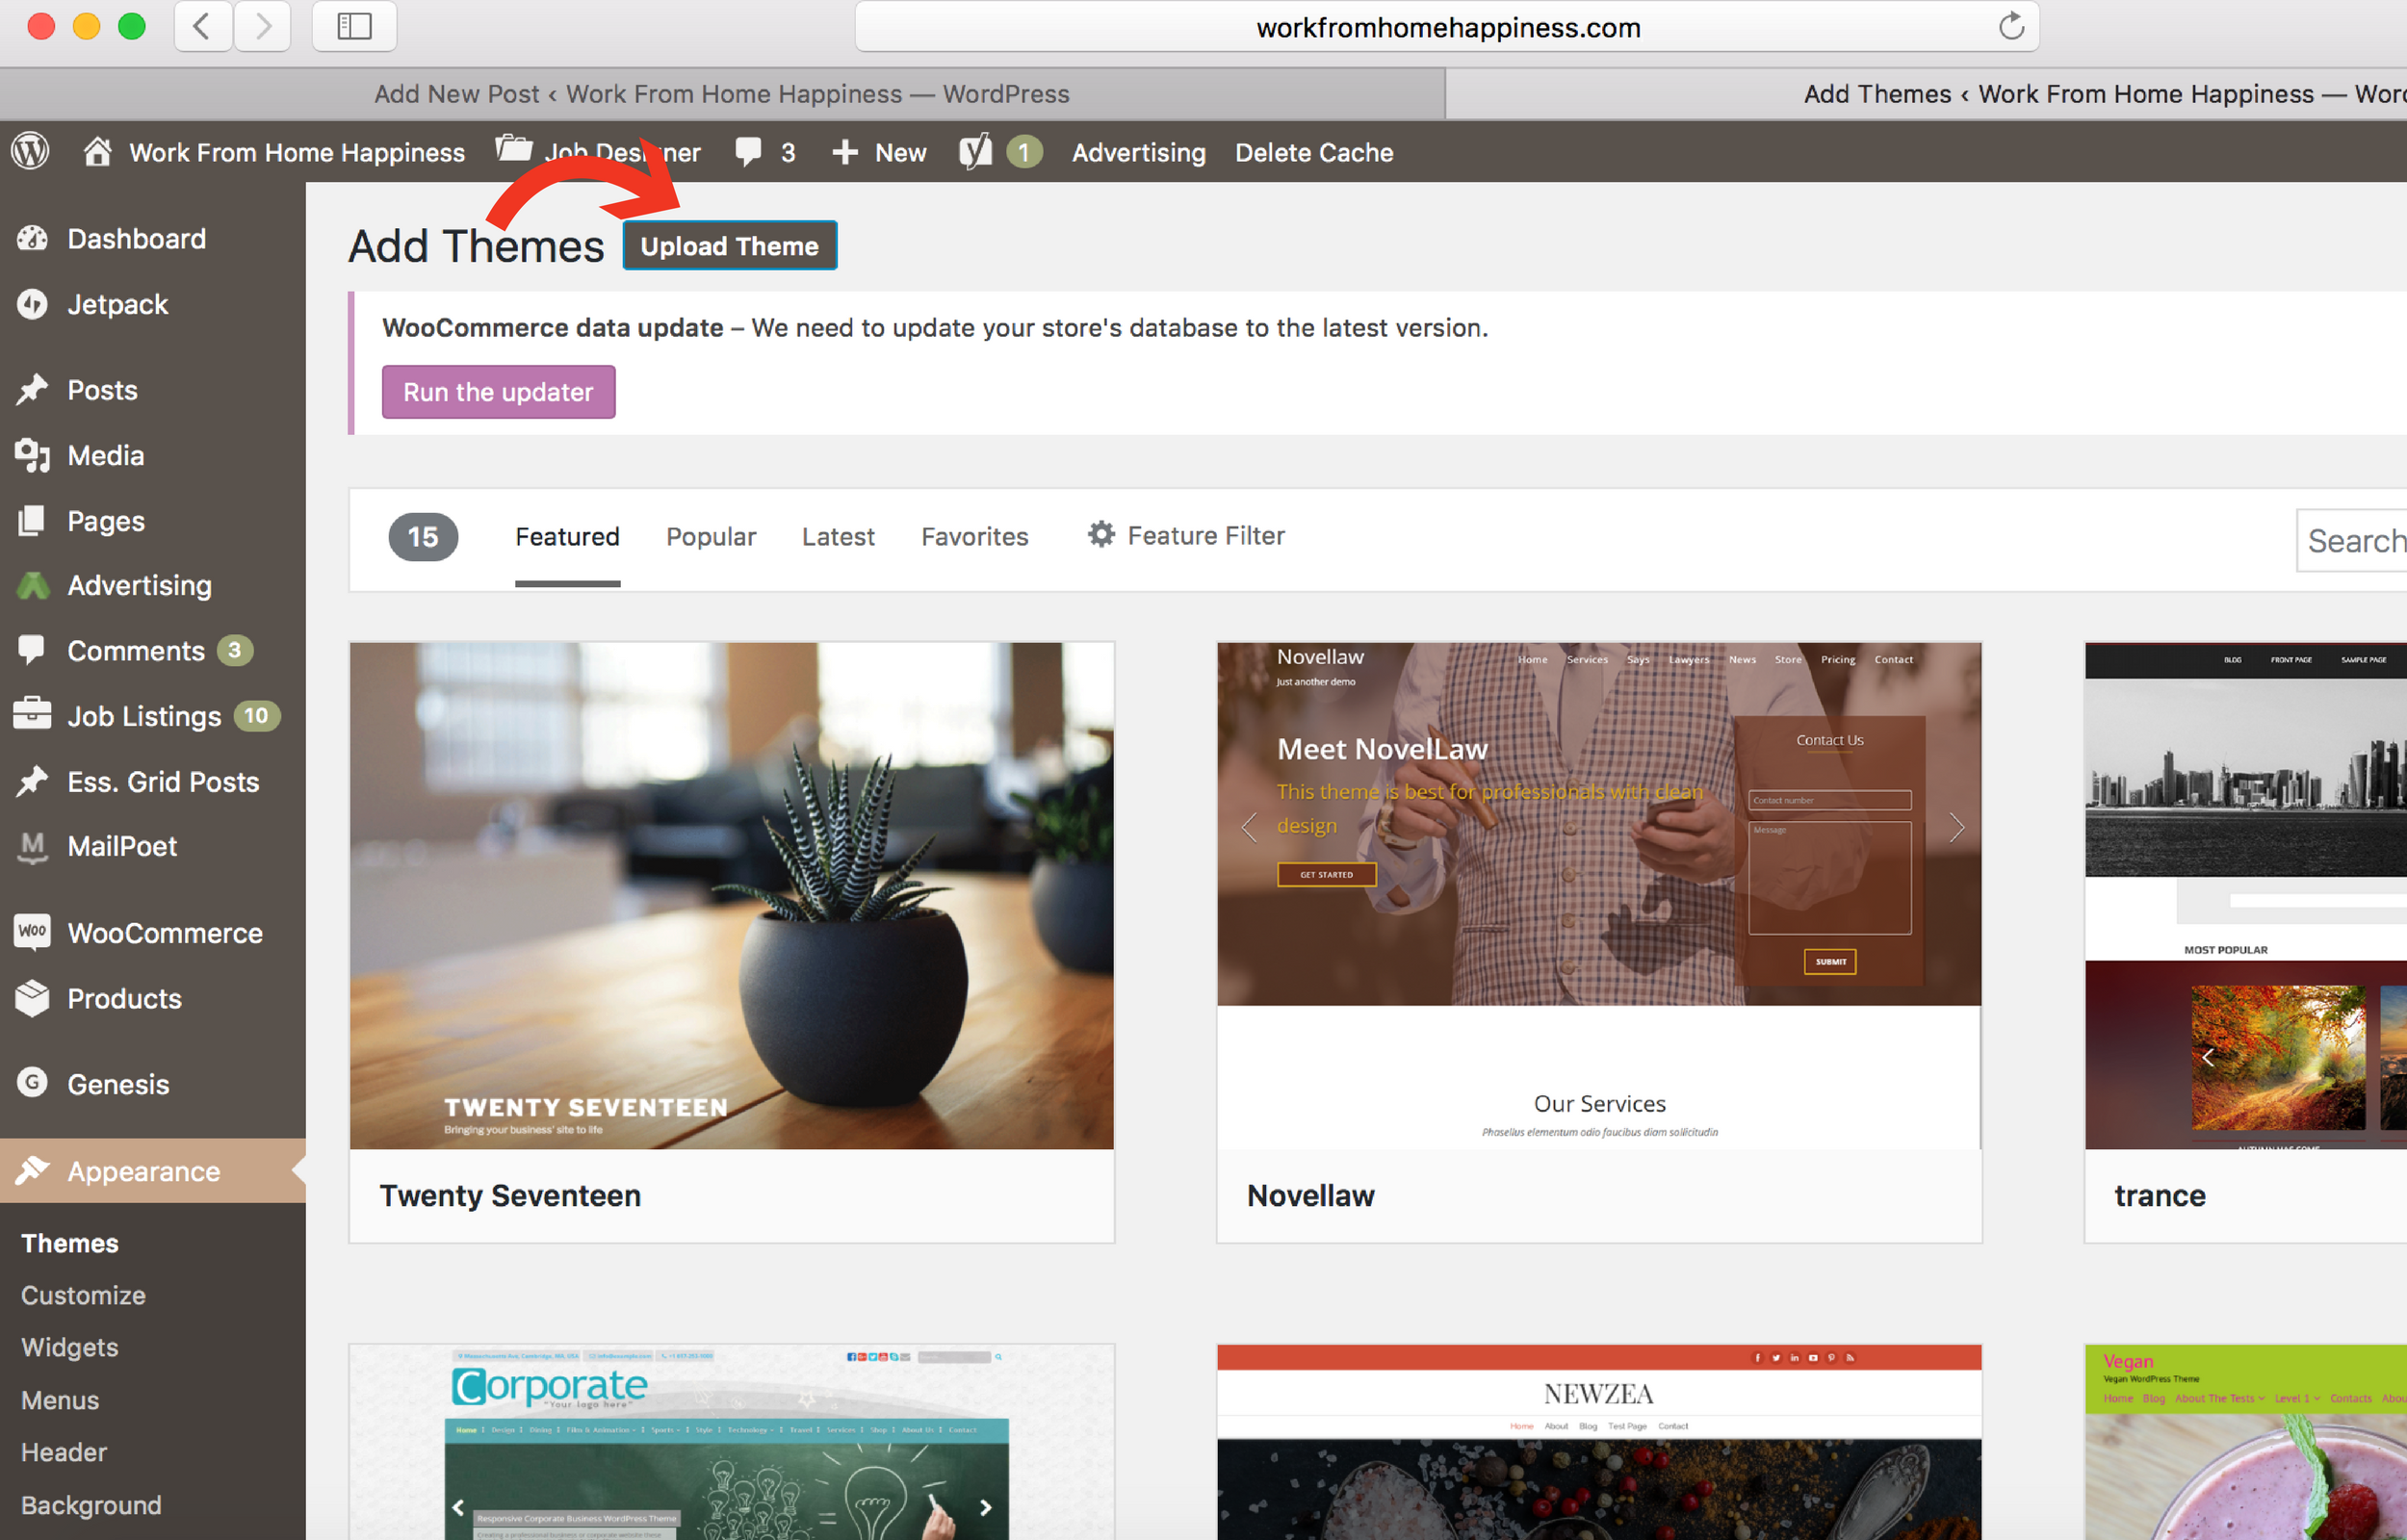
After you click the “add new” button, you’ll be redirected to a theme marketplace of sorts. Here you can search for a new theme or upload one you’ve already downloaded. This is where you can upload the Hired theme you downloaded earlier.
To do that, just click the “upload theme” button at the top of the page:
From there, the upload button will appear. This is where you select the Hired zip file or drag it over like so:
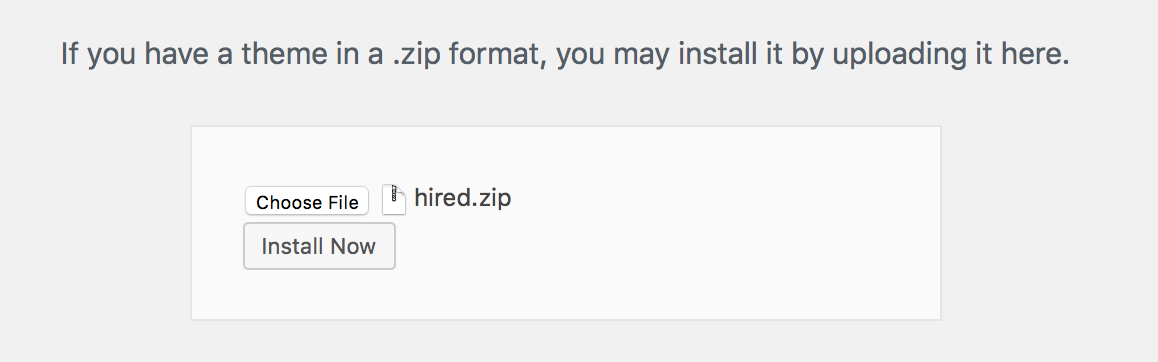
Now just hit the “install now” button. WordPress will automatically install the theme for you! After its installed, you just need to click the “activate” button.
That’s it! You’ve now got a professional theme installed on your personal website! Wasn’t that easy?
Customize Your Personal Website
What I love about the Hired theme is the amazing documentation that comes with it. The documentation provided by Modern Themes shows you the steps you can take to set up your site just like the demo. There are even video tutorials and how-to guides to help you every step of the way.
But, remember, what you include or don’t include on your personal website is up to you! At the very least, be sure to add your social profiles you’re active on like LinkedIn or Twitter. If your Facebook page is PG-rated, include that too.
And don’t forget to add a copy of your resume and an ‘about me’ page to really let your personality shine through.
Need extra help? Modern Themes offers installation services for just $15. They’ll get you up and running just like the demo leaving you more time to polish your online presence.
Additional Resources
Congratulations on getting your personal website up and running. It really can make all the difference in your job search whether you’re contemplating a career change or ready to cement yourself as an expert in your field.
For resume assistance and general advice on nailing your social media presence, sign up for the remote workers’ library below. It’s completely free and offers valuable insight into the world of working from home.
Have questions? Hit me with them in the comments below.
Happily,
Ashlee
Hi Ashlee!
Do you know the answer to this: I already have a blog up and running with BlueHost/WordPress, would I need to start a brand new account for my professional website under a new domain name?
Hi Melissa,
Great question. It depends. If you have the basic BlueHost package, you can only host one domain at a time. This means you could either start a new BlueHost account or simply upgrade to the mid-grade hosting plan that allows for more domains name to be hosted under one account. For example, I have one hosting plan but 5 websites that I host on that plan. All of them are managed through one account.
But, the short answer is ‘no,’ you wouldn’t need to start a new account. You may have to upgrade though to a different plan if you want to host more than one website 🙂
Happily,
Ashlee
P.S. Would love to check out your professional website when you get it up and running!